Tuesday, November 4, 2014

Seachest Project Revisited

This is our recent project at "Seachest" on Nantucket.  It's a particularly nice photo, courtesy of Brad Butman.  

It shows a pretty simple kitchen, ash cabinets, Valchromat doors, and some open shelves.  


Previous posts about this project can be found here, here, and here

Sunday, October 26, 2014

Before & After: How To Make A Small Kitchen Work Like A Big Kitchen


We work on small kitchens a lot. They can be great to work in, with enough storage and work area, if done well. But often basic layout mistakes make them almost non-functional. Sometimes we are able to make a variety of small adjustments that solve the problem. In this case, we were able to reuse a lot of the existing kitchen, without making radical changes in the layout.

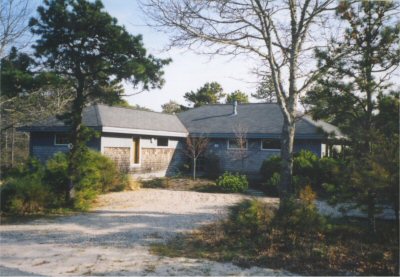
BEFORE - Lazy Susan cabinet in center corner
This isn't a great “before” picture of Jim and Phyllis's kitchen, but it shows the basic problems. The larger issues are that the sink work area is very awkward, and there is almost no base cabinet storage. As a result, stuff piles up on the counter, eating up the workspace. The upper shelves work pretty well; they hold a lot of stuff.

We thought a lot could be done with this, though, without tearing everything out.

BEFORE - no counter space left of sink
Looking at this from left to right, we come to a standard 33” double sink, right at the end of the counter. That's the first problem; you really need counter on both sides of a sink. It also shows the beginning of a solution. If you have a small kitchen, you need small appliances. A smaller sink opens everything up. We often use something known as a D sink. It's only 24” or 25” wide, but very big front to back compared to a standard single. You get a big sink in a small space. We're looking for inches here. This gives us about 11” of real estate we didn't have before.

Next to the sink cabinet you'll see a 24” dishwasher. We use a lot of smaller 18” dishwashers. They work fine for a small household. Now we've got another 6” to use for storage space.

To the right of the dishwasher is a lazy susan. The idea of the lazy susan is that it accesses the storage in the inside corner, potentially 4 square feet of storage that might otherwise be wasted. It sounds like a good idea, but the trouble is that to get to this space, you have to take away a foot of base cabinet left of the corner, and another foot to the right. The result is that to get 4 square feet (in plan view) of storage that is mediocre at best, you sacrifice 4 square feet of potentially much more convenient storage. And it's actually worse than that, because the susan has two levels of round shelving, whereas drawer cabinets could have up to four levels, a net loss in volume of probably 50% or even more. We almost always want to take out the lazy susan.

It's often the case that we end up ripping out everything from the existing kitchen. But, aside from reasons of cost, there were some good things about the existing setup. Those nice shelves. The workspace between sink and stove. And that nice set of perfectly good birch full extension drawers to the right side. And there was nothing wrong with the cabinetry to the right of the stove, another nice set of full extension drawers.

AFTER - new sink, new drawers, smaller dishwasher, better use of space
That's Jim Campen modeling the new kitchen. Jim and Phyllis are old friends, and Jim and I have gone on many bicycle tours together. Again moving left to right, we've used that D sink, bigger than it looks. This is made by Franke, who I believe originated the design. The smaller sink makes room for some much-needed counter to the left. There is a nice trash pullout below that. Pat Garrett and Shane Thurston carved “runnels” in the counter on that drain board side. Very nice. Putting the drain board left of the sink, liberates the counter on the right for cooking.

The dishwasher is 18”. Actually, 17 3/4” because it a Bosch, which is metric. Next you'll see a shiny new 18” set of drawers by the dishwasher. Except it isn't. It's the old set that used to be between the lazy susan and the stove. We made the new cabinets out of birch, and Steve Grunewald, who installed this with me, was able to restore the shabby and dirty fronts of those drawers to new condition.

Then, next to the stove, is a new set of matching, wide, 30” drawers. Some thought went into what was going to be stored where, so that the drawers could be the optimum depth. This more than doubles the available base cabinet storage that was there before. If kitchen design theory was going to be reduced to two words, they would be “big drawers.”


Planning what goes where, and how, means the drawers can be just the right size, and hold the maximum amount.

Sunday, September 28, 2014

Reusing Kitchen Elements


These are process photos for a kitchen project for Dennis Ross and Angella Gibbons not far from us in Marshfield, Vermont. New Frameworks Natural Building has built a spectacular, straw bale, timbered addition. I'm sure good photos of their work will show up soon at their website, newframeworks.com. I'll post better photos when we're done.


The kitchen part of the project took recycling much further than usual. For openers, after some repairs, we moved the whole sink unit, from the old kitchen to the new one. The door panels are birch bark. The first three units are the original ones, and we built the last two. Actually, “we” in this case is Ian Maas, who built this entire project, with help from Todd Krumperman on the install.


This next picture shows the island, and behind it, the stove wall. The wood for the drawer fronts is cherry that used to be treads from a staircase that was removed. It was quite a project to gather this wood, denail it, clean it up, replane it, and so on. The old nail holes and other blemishes add some character, and make a neat story.


Ian and Todd made a lot of use of the “live edge” of the old cherry treads. Here that top drawer has a live edge on the bottom. That thick butcher block top is something Dennis has been storing in a barn for several decades, waiting for a new purpose. After a lot of sanding and other repairs, it's ready for some more decades.


Monday, September 15, 2014

Love Your Contractor


Figure out the basic kitchen design early in the design process. 
Don't leave it until construction is underway.

We've been involved in few recent building projects that went awry in fairly major ways. We were doing the kitchen part, and got a bird's eye view of how the major work evolved over time. This post is about how folks doing big renovations or new construction can set their project up well, find a builder, and end up months later with a home everyone can feel good about, on or near the original budget.

First, don't try to be your own General Contractor (GC) if your job is large or complex. Being your own GC is very popular now, somehow as a result of the seeming empowerment of the internet. People think, and perhaps are encouraged to believe, that by this means they can save money by avoiding the contractor's markup. This will almost never be the case. A good builder disciplines the design process, manages the schedule, guards your money, clarifies your choices, and perhaps most important, gets the right subs to the site at the right time and gets them doing what they should be doing. You cannot do any of these things. Each has to be done well for the project to succeed.

Here are some procedures for finding a good GC.

  • Ask your friends. Get referrals from people you know, not from websites. You are looking for a smallish outfit, the right size for your project. An outfit small enough that the principle person will actually be wielding a hammer, working on site, supervising in person. Or at least, own a hammer.
  • Go see their work. You are looking for someone whose taste is compatible with your. When you see their projects, you want to say, “This is really nice.”
  • Ask customers what their experience was like. How was the estimating? Was the job completed anywhere near on time, and if not, was it the builder's fault or the customer's? You are going to be very close to your builder for a period of a weeks or months. Will it be pleasant to have them in your life?
  • Do not try to pick your builder's electrician, plumber, tile person, or whatever. Builders develop close relationships with a small group of such people, who then know what the builder wants, and show up when they are needed. They trust, support, and depend on each other. Sometimes these relationships go back decades. This translates into efficiency, even when a particular sub seems a bit more expensive on paper. If you have somebody great in mind, suggest it, but let the builder decide.
  • Similarly, don't get involved in obtaining materials, unless your builder thinks it will help. Don't try to manage your builder. Do not make design changes after a given phase is underway. Nothing is more costly and disruptive than waiting, tools in hand, for your customer to decide something. Except perhaps redoing something that has been done well, because of an ill-considered design change.
  • In short, love your builder, make their life easier.

Loving your builder also means pay promptly. If you get the bill on Wednesday, give your builder a check Thursday. By this simple rule, you will guarantee that you get the builder's best work. It's not unusual for folks to get the bill, then, a week or two later, begin the process of transferring funds from one account to another, then a week or two after that, cut a check, which can't really clear til next Friday. This demoralizes the builder, causes financial problems for him or her, and diverts attention from the actual work. In short, have your checkbook ready and loaded.

The GC's work is difficult and risky. Their day starts at 5 or 6 AM, when they call the subs. It ends at 8 or 9 PM when they finish talking to you. They have to manage and coordinate many people, including you. By the time you re-take your home, they will have earned their markup, which mostly just goes to keeping their business afloat.

A final point from the kitchen person's perspective. Often folks, eager to get their project off the ground, leave the kitchen design to be done later. They or their designer, just rough in a kitchen layout, including window locations and appliance locations. Often this means that the kitchen person has to work around window locations, appliance positioning, or passage dimensions, which could have been much better with small adjustments and no added cost. Get the basic design right along when the layout is set.  There will be plenty of details that can then be sorted out at leisure.

For a successful project, keep it simple!  Bob Sparrow, Builder