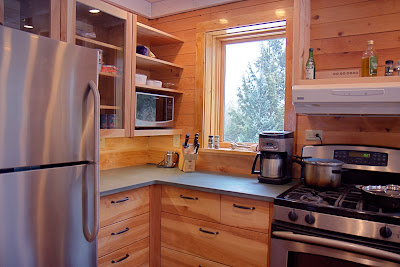
The usual practice in cabinet manufacturing is to offer a few standard drawer configurations, often getting deeper toward the bottom of the cabinet.
One of the advantages of custom building is that there's no need to standardize. You and your customer can think through each drawer: what should go there, how much space it needs, and what dividers might be useful.
If you do this kind of planning, you'll often end up with more drawers, and maybe 15% to 25% greater storage capacity overall. It's also worth mentioning that big drawers are a good value in custom cabinets, because the labor in a wide drawer is about the same as in a smaller one.
For example, 3” is plenty for silver, but 3.5” is better for utensils.There's also no unbending requirement to put the biggest drawers at the bottom. You might decide that you have this heavy mixer you use a lot, which requires a 13” drawer. Maybe you want it in a top drawer so you don't have to bend down to pull it out.
Another factor is what we call the “optimum reach zone.” The top two drawers, the back of the counter, and the lower shelves on the wall are the absolutely best, most convenient, easiest-to-access storage. You don't have to be tall or have good knees to get at that stuff. So in planning drawers, we often put the most-used items in the upper one or two drawers. It saves a lot of needless walking, bending, and searching while cooking or cleaning up.
Of course, for regular readers of this blog, I don't have to mention the First Rule of Gilbrethian Ergonomic Design: Storage at point of first use! Whenever possible store things where you will be located when you need that thing. The things you use the most get the premium storage.
In Figure 1, the boxy top drawer in Cabinet F is for bottles of oils and sauced, right by the stove. To the left, two drawers for spices. These are constantly used items, stored right where they are used.
 |
| Figure 1 - Custom Drawer Sizes |
Usually my customers and I work over these locations a number of times to get it right.
We start by figuring out what kind of drawer hardware they want. If we use side-mount Accuride, you'd have about 26” of capacity to distribute over 4 drawers. With those hidden softclose “Blumotion” drawers, you have more like 23”, because the hardware takes up space between drawers. With the less costly Blum Metabox drawer system, you get around 24”. In a three drawer stack, you get a little more.
I give people a little chart of typical depths of drawers for certain contents (Figure 2) as a starting point; their actual stuff may differ from these average drawer capacities.
 |
| Figure 2: Drawer Depth Chart |
After we talk about it a while, we try to get a few key things located. Maybe knives, utensils, silverware, those tall bottles of oil, and so on. We take a set of elevations, and start to label what goes where. We're working toward a chart that shows the contents and depths of all the drawers in a given stack. Figure 3 is the chart for this bit of cabinetry.
 |
| Figure 3: Chart for Custom Cabinetry |
This might seem confusing. But it's pretty easy, fun, and definitely worth it. Getting specific in this way often introduces a little visual variety to how the kitchen looks.
In the shop it might seem very difficult to be constantly changing your layout for hanging drawers hardware. But we make a little template stick for each bank of drawers. The stick is the height of the cabinet, and shows all the relevant clearances and dimensions. We use it for every step of the cabinetmaking process. It's not really extra work, and the results are much better.
 |
| Ian Maas using a Template Stick while creating custom cabinetry at the SCD Shop |


